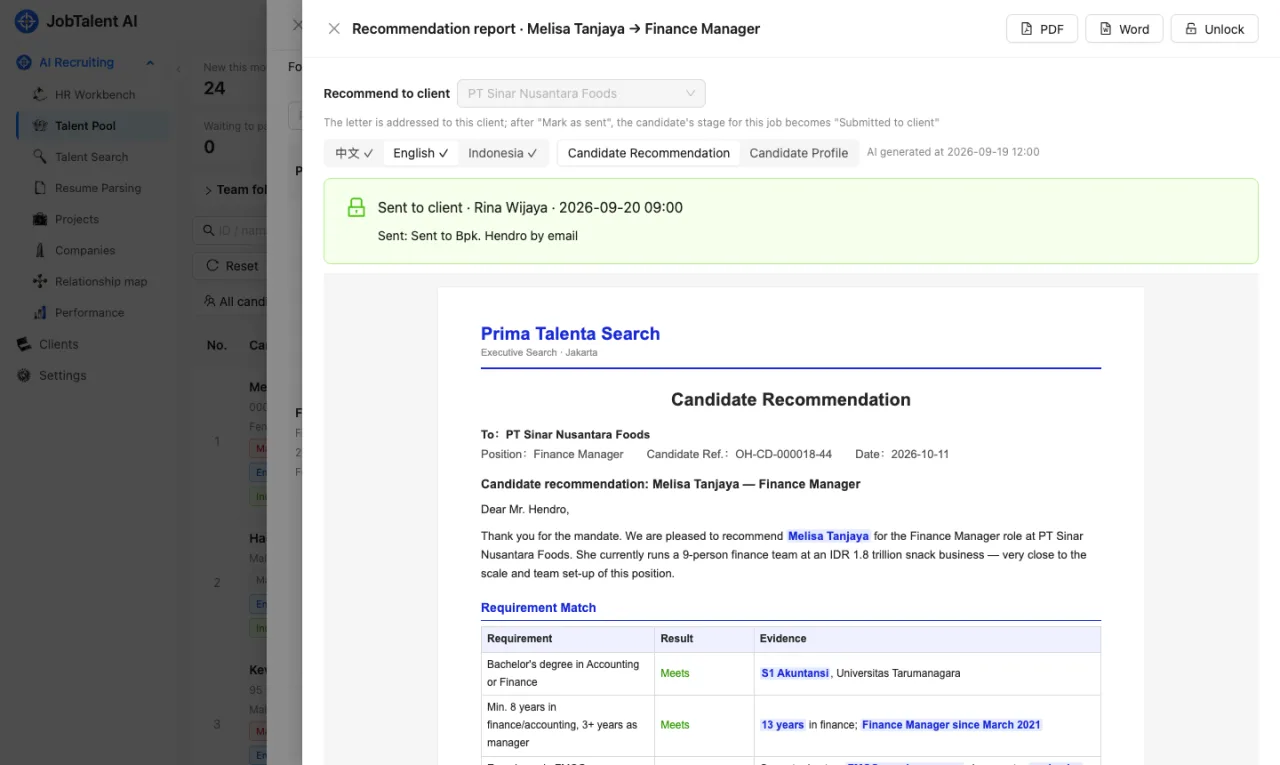
Follow these steps in order. The first three are done by an admin. Every recruiter uses the steps after that.
1. Log in
When your account is opened, you receive a login address and an admin account. Open the address in your browser and log in with the username and password.
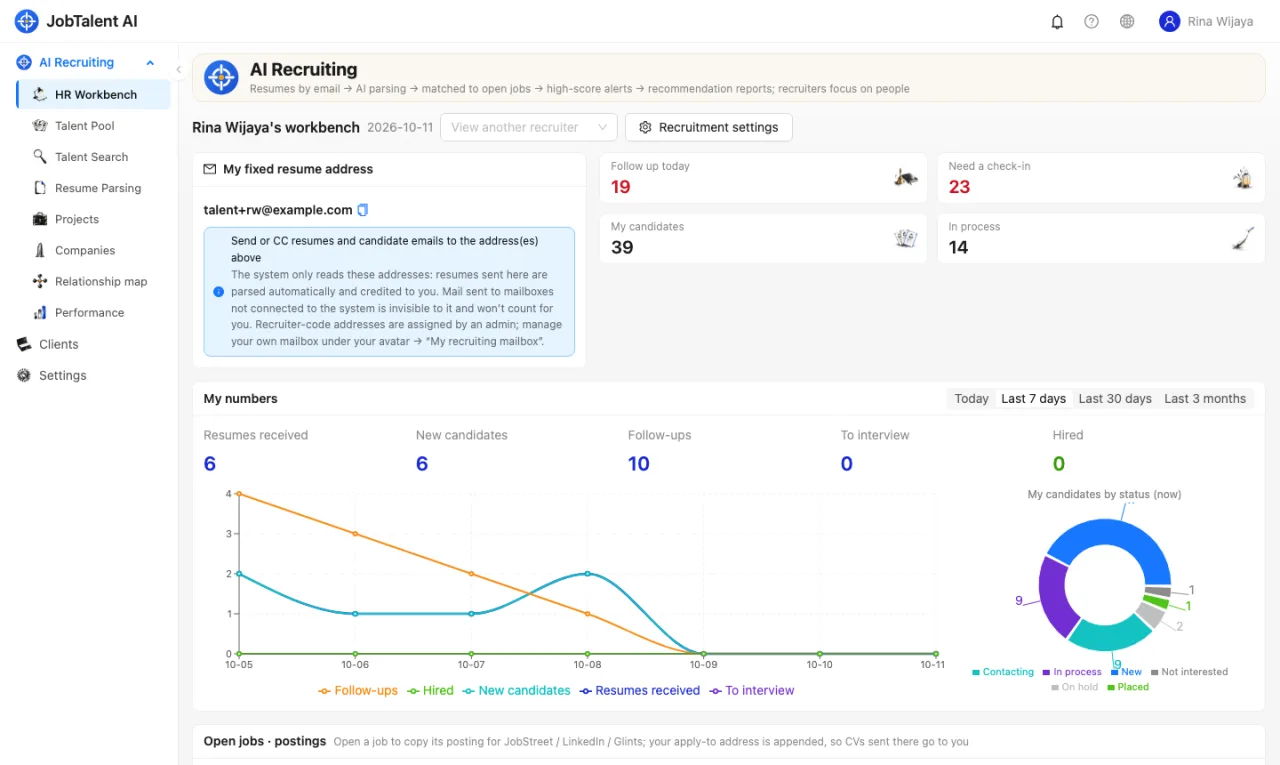
You stay signed in for 10 days, and the login page remembers your username, so next time you only enter the password.
- If you open the general login page, the system first asks for your company's own URL prefix. You can find it in the account setup email.
- After that, open your company's own address directly to log in. We recommend bookmarking it.
- To change the interface language, click the globe icon in the top right: 中文, English, Bahasa Indonesia.
2. Add members
An admin goes to "Settings" → "Members", clicks "Add member", creates an account for each colleague, chooses a role and sets an initial password (at least 8 characters), then gives the username and password to the colleague.
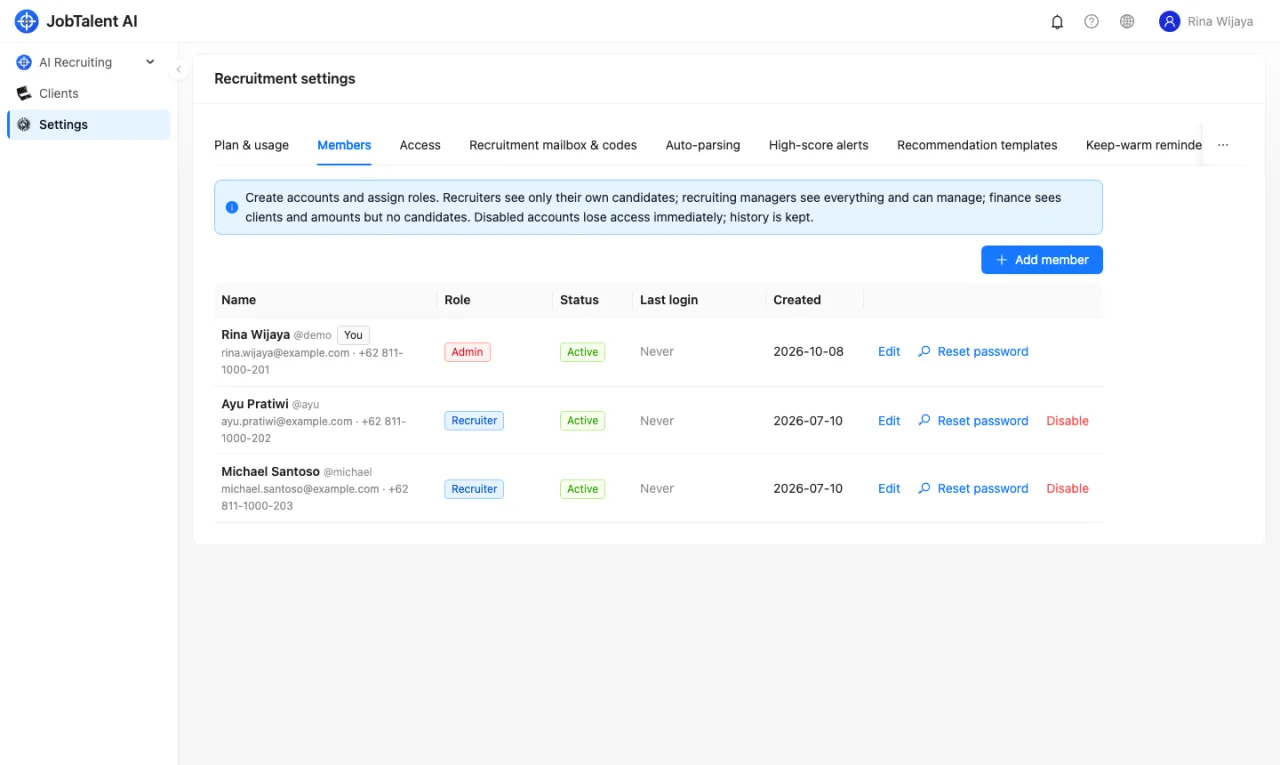
The role decides what each person can see: recruiters only see their own candidates, recruiting managers see everything and can manage settings, and finance only sees clients and amounts. See Members, roles and permissions.
3. Connect a recruiting mailbox
First get the recruiting mailbox ready. For Gmail, set up an app password, see How to prepare a Gmail recruiting mailbox. For a business mailbox such as Alibaba Mail, Tencent Exmail or NetEase Enterprise Mail, enable IMAP and prepare the password, see Receive resumes with Alibaba Mail, Tencent Exmail and other mailboxes.
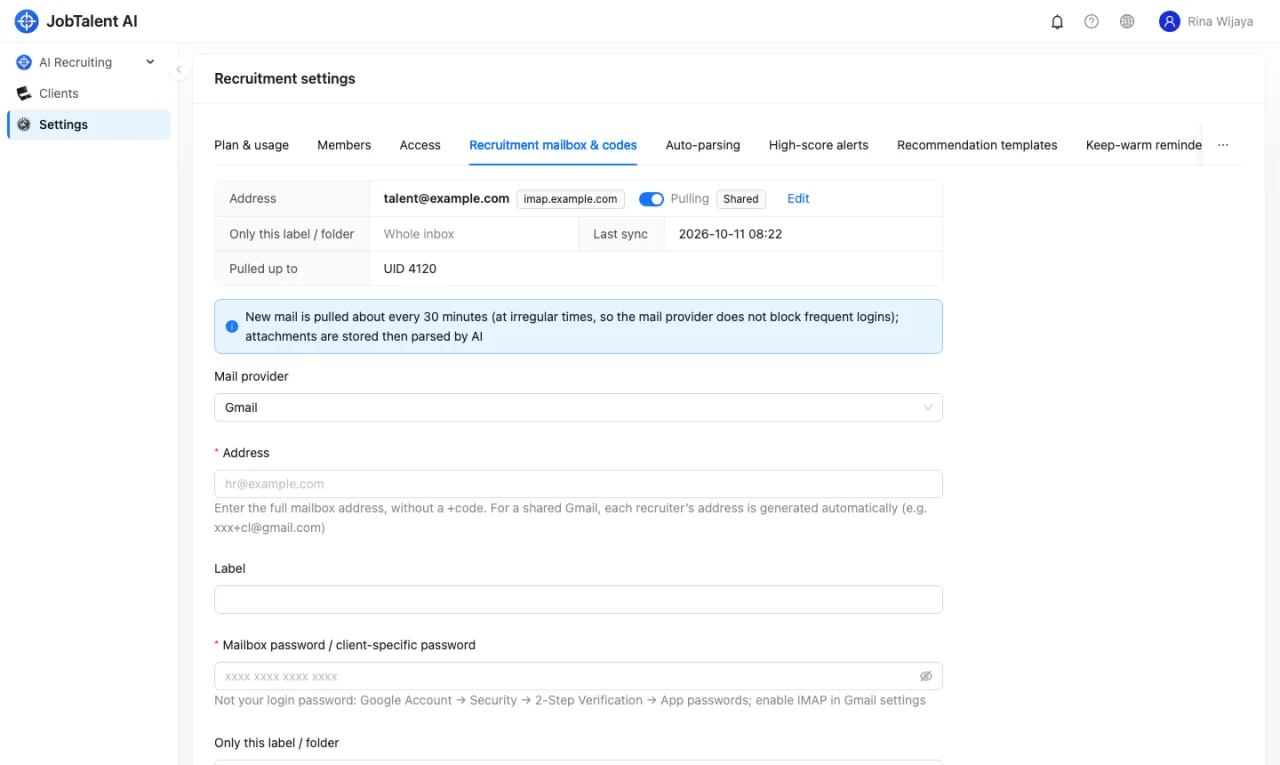
Then connect the shared company mailbox in "Settings" → "Recruitment mailbox & codes" and give each recruiter a code. Or let each HR connect their own mailbox from the avatar menu in the top right → "My recruiting mailbox". You can use both together. See Connect a recruiting mailbox.
If you use a personal Gmail, we recommend pulling only one dedicated label so personal email stays out of the system. See Resumes only: use a Gmail label.
4. Create clients, projects and positions
- In "Clients", click "New client" and enter the client name, contacts and so on. You can skip this step for internal hiring.
- In "AI Recruiting" → "Projects", click "New project" and choose the type (Client or Internal) and the client.
- In the project, click "New position", enter the position title and job description (JD), click "AI split requirements", check them and save.
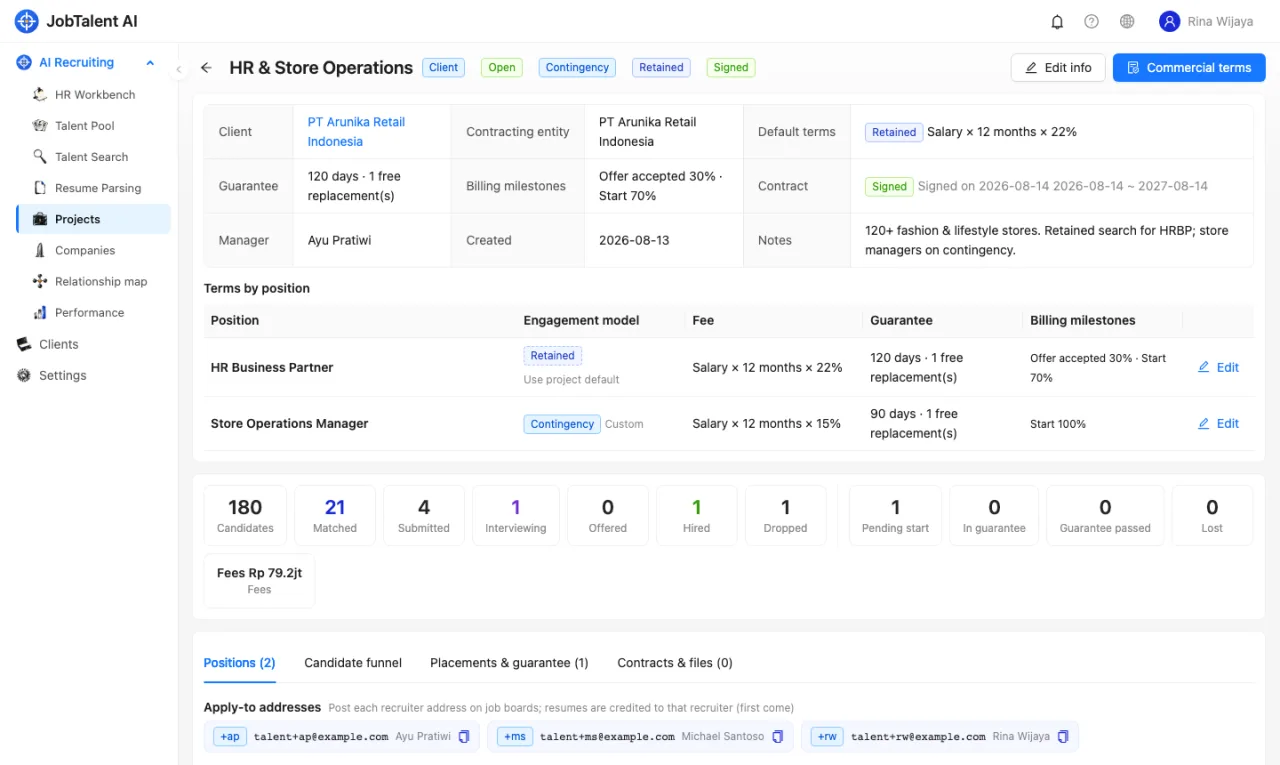
AI only matches candidates to a position when the position is "Open" and its project is "Open". See Clients, projects and positions.
5. Check the AI scores
When resumes come in, AI parses them automatically and then scores them against each open position. This usually takes a few minutes to a few dozen minutes.
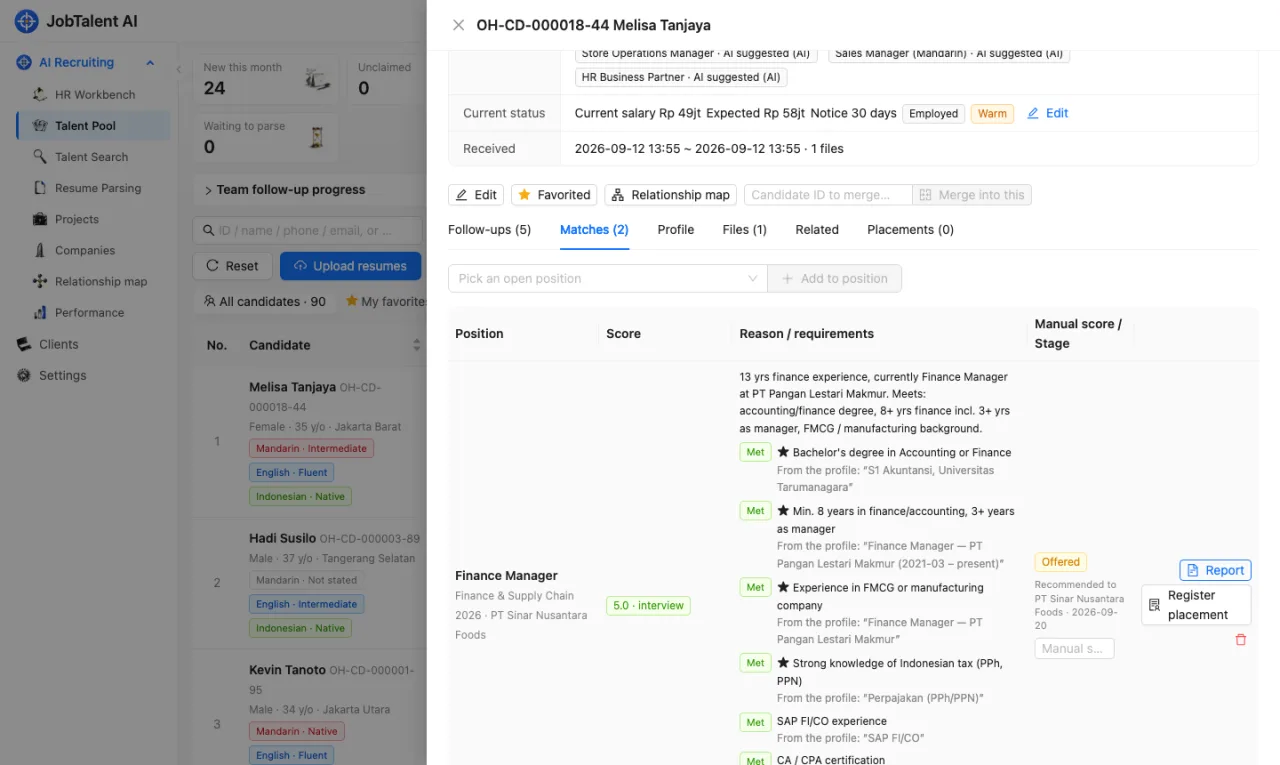
- In the "Talent Pool", filter by position. Candidates are sorted by match score.
- Open a candidate. In "Matches" you can see the score, whether each requirement is met, the original text from the profile used as evidence, and the reasons.
- You can add follow-up notes, change the stage, and enter a manual score.
See AI parsing and candidate–job matching and Talent pool and search.
6. Send a recommendation report
In the candidate details, go to "Matches", find the position and click "Report". Choose which client to recommend to, let AI write the recommendation letter and candidate profile, edit them, export to PDF or Word and send them to the client. Then click "Mark as sent". See Recommendation reports.